Measuring plain bearings – how to measure correctly
Lars Butenschön | 30. July 2020
Want to measure plain bearings? Of course you do. With the caliper, of course (or if, like the author of this text, you always got one from the instructor for this purpose – of course, by ‘one’ the caliper is meant). This may work quite well with steel plain bearings, a little spit and a good sense of proportion, but with polymer plain bearings, the heart of a quality manager begins to beat faster with this thought. Measure what you want, when you want! Great!
In fact, this measuring method has some pitfalls with polymer plain bearings. Some of them are obvious, some less so. So what is to be considered? And which measuring methods are better suited for measuring polymer plain bearings? Let’s take a closer look.
Problem 1: Polymer is “soft”
If you place a caliper or a micrometre gauge on a polymer plain bearing, you will notice that you can press on it for a relatively long time until the value on the display (or the position of the lines in relation to each other on older models) no longer changes. Not surprisingly, this is because the steel of the measuring instrument presses itself into the polymer.
Problem 2: Polymer plain bearings are pressed in
The press-fit itself is not the problem. But the way it works. To ensure that the press-fit works, polymer plain bearings often have a press-fit oversize. This means that the actual outside diameter can differ significantly from the nominal dimension. Quite often the outer diameters do not even have a specific tolerance. This is again due to the fact that the necessary press-fit interference can vary from polymer to polymer.
The reason: different polymers expand in varying degrees under the influence of temperature fluctuations and air humidity. Accordingly, the necessary allowance for the press-fit is often based on the manufacturer’s experience.
And another difficulty arises from the press-fit. The dimension of the inner diameter changes with the press-fit. The press-fit is based on the idea that the bearing is pressed into the hole. It narrows and gets stuck. The inner diameter also changes accordingly.
Conclusion: many “common” measuring methods do not meet the application profile of plain bearings
In practice, it looks like this: the freshly ordered bearings are taken out of the bag and measured with the caliper or immediately on a 3D measuring machine. Later on the AHA moment. Press-fitted, the plain bearings lie perfectly within the tolerance.
Tip 1: Only measure plain bearing after press-fit

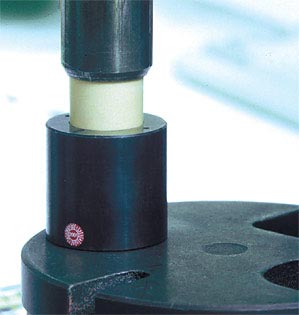
Use a press-fit sleeve – or a specimen of the component into which the bearing will be mounted later – which meets the requirements described on the drawing or in the product documentation. The correct tolerance of the housing hole and the absence of burrs or other foreign particles are important. These can influence the dimensions of the press-fitted plain bearing.
Tip 2: Use test pins
The use of special test pins is recommended for checking hole fits. Due to their fine tolerance, the fit of the plain bearing can be measured most effectively.
In addition, the bearings in the press-fitted state can be measured in several levels on the inside diameter to check the uniformity of the wall thickness. For this purpose the measurement using a diameter gauge is suitable.
We advise you!
Do you need support in the correct design and measurement of plain bearings? We will assist you personally and free of charge online, by telephone or directly at your site.

